Showing posts with label Projects. Show all posts

Monday, July 14, 2014

The story of a wardrobe: Part 2

Hi friends!  I'm back today with Part 2 of our wardrobe story.  Last week, I shared Part 1 with you.  Here is how we left her.  I think she is going to be a real beauty!!


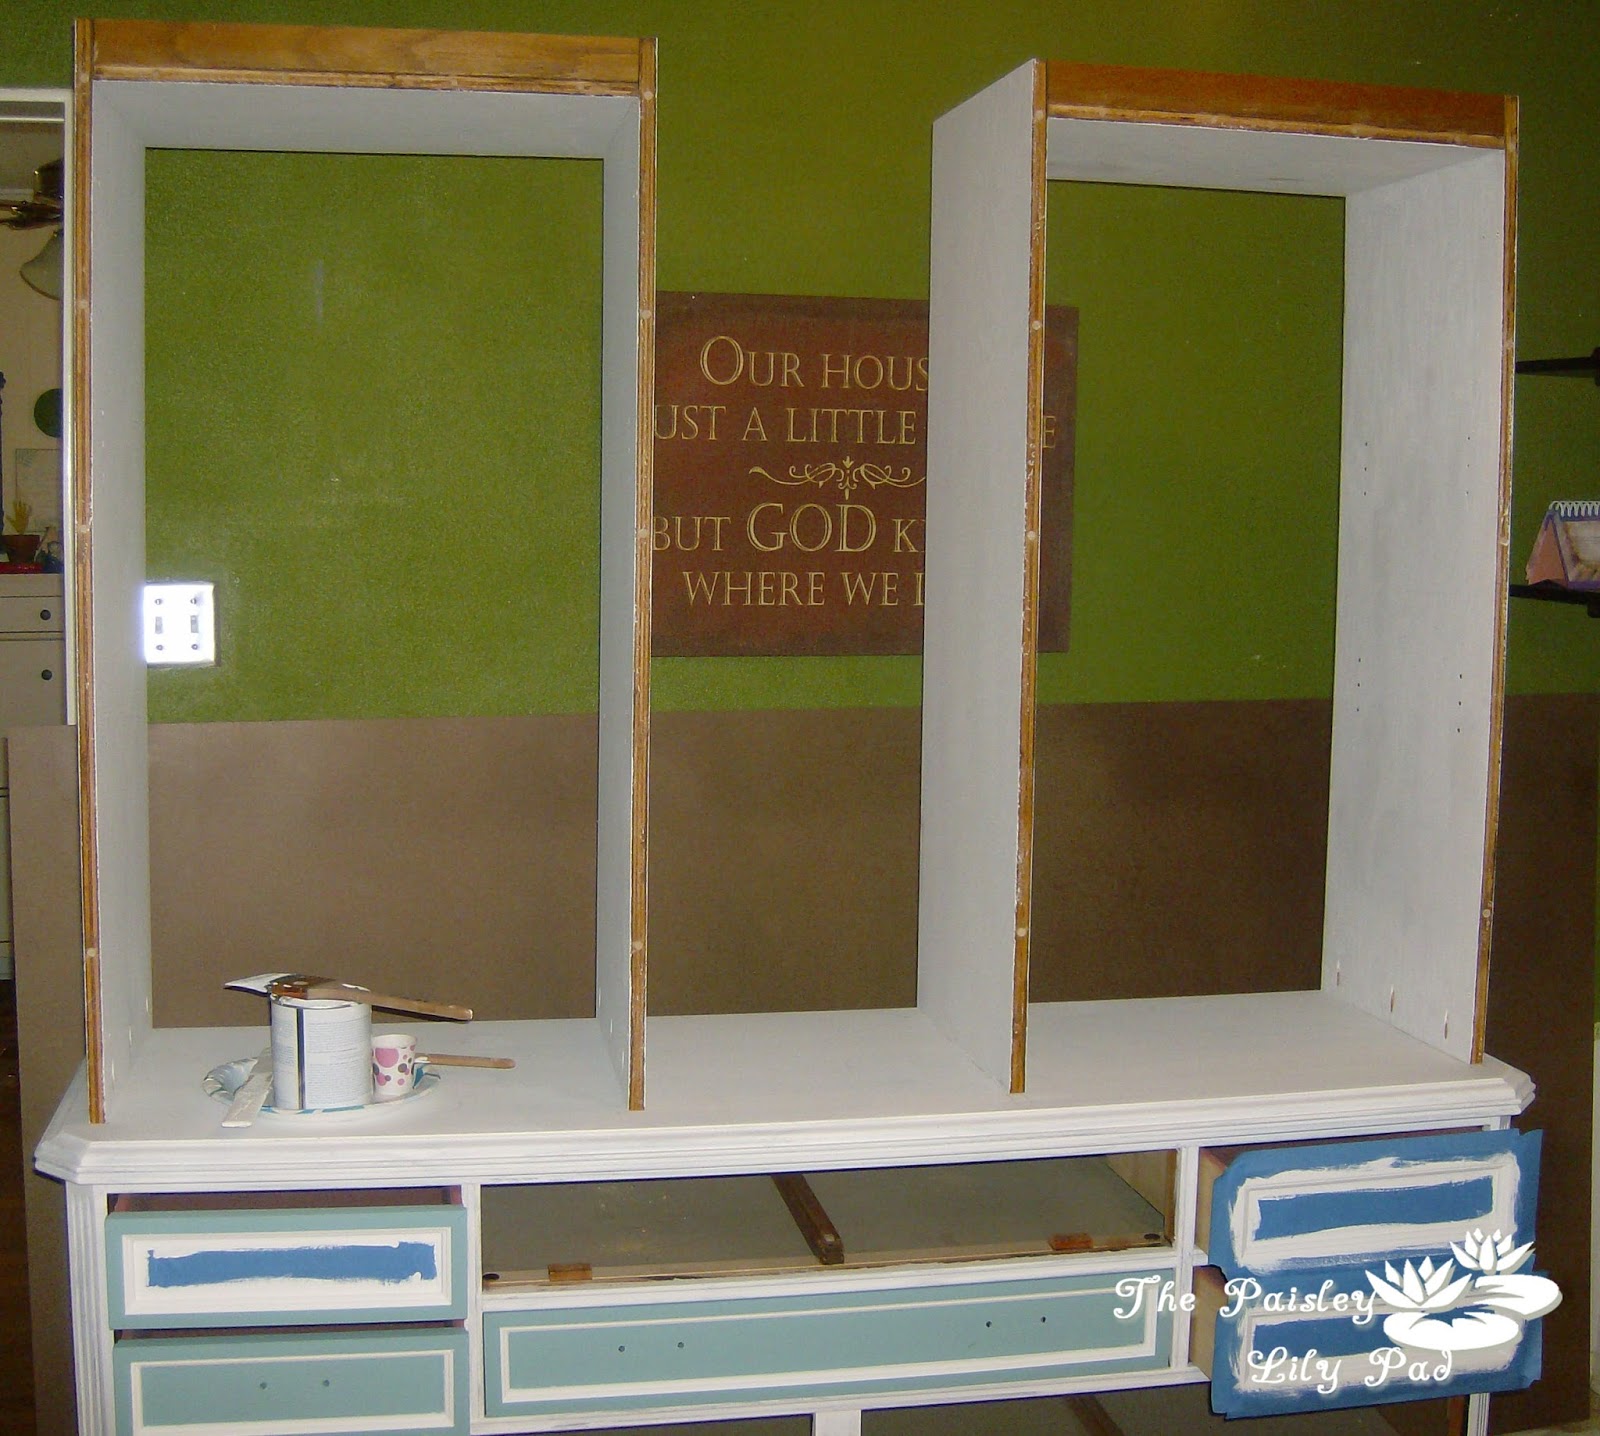
I had painted the whole base piece and the drawers, inside and out.  However after looking at the drawers in place, I felt like they needed a little something extra.   I decided to paint the inset trim white.  


I was not looking forward to the loads of time it was going to take taping those drawers off!  Ten drawers with four corners on each drawer equals 40 corners to go around with tape!  YIKES!!!  Then..........
Aha moment!  I remembered that a while back I had snagged several packages of Scotch Painter's Tape for Hinges on clearance (you know, just in case) at my local True Value store.  Hopefully these 'stickers' were going to cut my taping time in half!


I cut each sheet in half as straight and square as I could then I taped one half of one hinge 'sticker' in each corner.  Each "hinge sticker" sheet covered four corners.  All that was left was straight runs with my Scotch Blue Painter's Tape!


This is where my story grows dim......

You see, I had just brought home a new can of paint from my local Annie Sloan Chalk Paint Stockist, The Weathered Cottage and was in the process of shaking the can upside down (as is my common practice) and the can slipped out of my hands, landed on my kitchen floor and proceeded to POP OPEN!!

NOOOOOOO!!!


There was white paint splattered everywhere!!  In fact, I wish I knew more about physics because there was paint found in places weeks later that didn't make sense as to how it traveled and landed there.  I was completely speechless.....almost all of my freshly painted drawers had white paint on them in places that I did not intend for white paint to be (as did many other spots in my kitchen).  I am so thankful that my lovely mom was standing in the kitchen with me when I did this.  All we could do was look at each other and laugh hysterically.......after a good tearful laugh, we started cleaning it up.  I tell you what though, this spillage experience has made me a forever fan of Annie Sloan chalk paint.  It wiped up with water so well.  I kept saying "I'm so glad this isn't latex paint! I'm so glad this isn't latex paint!".  The drawers wiped up well.  They needed a little sanding where the splatters landed and some touch up paint but all was good as new and we moved on.

Up next were the doors and the trim for the doors.


More taping followed....


When I removed the tape there was quite a bit of touch up to do.  Here's a photo of 3 doors waiting to be touched up, in my living room!  Yes, that is how I roll.  My poor family suffers through periods of having the living room (and kitchen) overrun by furniture pieces!  They must love me a whole lot! :-)


The next step was to join the two 'towers' so they would become one solid piece and would not sway.  To do this, we used a shelf that came with the cabinets and cut it into 2 pieces (by we, I mean my husband).  The smaller piece would face outward and the larger piece would face down.  I used my trusty Mini Kreg Jig to drill some pockets holes then we were ready to join 'em up!


I used my favorite Makita drill and Kreg screws like these to attach both pieces to the 'towers' on either side.


Here's a photo from the top side.


If you like to DIY furniture and have never used a pocket hole jig, I highly recommend purchasing one to add to your tool arsenal.  It joins pieces together very securely, plus it is super easy to use.

Next up on my to-do list was to add trim to the base piece.  This is the step that really made it look like one cohesive piece of furniture.  I added flat trim above where the doors go, shoe molding where the 'towers' meet the dresser, decorative trim along the front and crown molding at the top.


Here is how she looks with all the trim waiting for a final paint job. (I apologize for the cloudy appearance of the photos,  it was dark outside when I took these in-progress photos and before I owned a DSLR)


 Here is the dresser!  I am thrilled with how it turned out.  It was worth every minute it took to tape off those drawers.  The new hardware completely changes the look.  I purchased the cup pulls and drawer pulls from my local Home Depot.


There are still several things left to do:

  • Stencil and attach backing
  • Attach shelf brackets to the center section 
  • Install closet rods &
  • Attach doors
See y'all soon with the final reveal!


**************************************
Disclosure: This post contains affiliate links.


Friday, July 11, 2014

The story of a wardrobe: Part 1

A long while back, I shared that I got a dresser and hoped to turn it, plus two other pieces of furniture, into a wardrobe for our daughters' room.  The plan looked like this.
Our plan was to use this dresser and 2 identical cabinets that we found on craigslist.  Really, we only used the top of the cabinets.  The drawers we get to use for another project down the road.  The reason why we decided to use these cabinets instead of just building a top for the dresser is because the cabinets were built out of sturdy oak plywood and cost less than buying 2 sheets of pine plywood.  Plus we ended up getting another 6 drawer dresser for free with the cabinets.


I began by removing the wood pulls, the cabinet hardware and the trim on the front of the cabinets.  Below you can see the difference between the two cabinets after the doors, hardware and trim were removed.  {Tip} If you are planning on reusing hardware, take a photo before removal to refer to when you are ready to reuse it.


The trim was held onto the front of the cabinets with glue and wood dowels.  My husband took a hack saw blade and cut off the dowels that were stuck in the cabinet so they would be flush with the edge.


Next up it was time to cut the top off of each cabinet.  We needed some way of guiding our circular saw along the side of the cabinet, so my husband screwed up a scrap piece of wood for the saw to slide along to make sure we got the straightest cut possible.  We also used ScotchBlue Painters Tape on the cut line to help ensure a smooth cut without chipping or splintering the wood.


We were left with 2 cabinet tops and 2 drawer bottoms.


Now it was time to get painting and then on to reassembling.  I had been seeing chalk paint used for furniture all over the place and could not wait to get my hands on some and try it.  I read wonderful reviews about how chalk paint would stick to surfaces without having to sand the surface or use primer.  I decided to use Annie Sloan Chalk Paint in Pure White on the main part of the wardrobe, Provence on the doors and drawers and Scandinavian Pink (by special request) on the inside of the drawers.  After removing all of the drawer hardware, I sanded the drawer fronts to minimize the appearance of the old hardware lines.


Here are all the drawers after a couple of coats of Provence and the dresser after a couple of coats of Pure White.  I have to say that I loved using this paint!  It dries so quickly and you do not have to wait 4 hours between coats like you do with latex paint. (sometimes even longer depending on the sheen)


Of course I had to try out just one drawer to see how it would look.....it seemed to be shaping up nicely!


After most everything was painted, we began to assemble the wardrobe.  The tools we used were a Mini Kreg Jig Kit, Kreg Washer Head Pocket Screws, my favorite Makita Drill, wood dowels and a Quick Square


We used the Kreg Jig to make pocket holes along the edges of the cabinet tops so we could securely attach them to the dresser.  For a little extra insurance, we also drilled aligning holes into the dresser and the bottom of the cabinet tops to insert wood dowels.  The dowels really helped to make sure that the tops stayed square as we screwed them into the dresser.


Then we attached the cabinet tops to the dresser.


Before we went much further in the assembly process, we decided to move the piece out of our kitchen into the girls' room.  I wasn't real sure of how sturdy it would be and I didn't want to take a chance on it breaking or splitting.  Plus, the dresser itself was quite heavy, then we added more weight on top of it.  


And that is where I am going to leave y'all for now, looking at a strange, boring white piece of furniture with no drawers.  I promise, it gets better!!

Be sure to stay tuned for my "painting in the kitchen woes" story.   


**************************************

Disclosure: This post contains affiliate links.

Monday, July 7, 2014

Shed to a Schoolhouse Side No.2


Great news!!  Side No.2 of our Shed to Schoohouse makeover is finished and ready for caulk and paint.

In February last year, my husband and I began to reside our shed with the hopes of turning it into a "Schoolhouse" that we could use for homeschooling.  **squirrel trail......At the end of the 2013 Summer, we decided to put our daughter back in school.  She really missed her friends and her school!  She had an amazing '13-'14 school year and we couldn't be more proud of our book-aholic!! **  We have continued to make progress over the last year on this project.  It has certainly been a challenge, but we have learned so much along the way and are thrilled with the outcome so far.  Here is what we started with.  Some major TLC needed to be given to our dilapidated backyard shed which was once an apartment with dark paneling and a half bathroom.  Our plan is to take it one side at a time and repair the outside then we get to move on to the inside.   Side No. 1 was an amazing transformation!!


Without further ado, I introduce you to Side No. 2.  Do you see that window?  It faces our side yard and further on, some of our front yard.  In order to see those yards through this window you have to stand on a stool on the inside.  


I was able to talk my husband into switching the windows from Side No. 3 to Side No. 2.  
Below is what we were left with after prying off boards so we could frame for the larger window.


Here is the new window installed.  So much better!  Now we can see the front and side yards without having to stand on a stool on the inside.  Also, when it was on the opposite side, our carport ran right through the middle of the window.  Who wants to look at the top of a carport??  This was a win-win kind of change! Yippee!


Below we are prepped and ready for plank siding.  We also replaced any 1 x 12 boards that were in all around bad shape.  Cutting all those angles was so tedious, especially using a circular saw to do it.  Let's just say, I am gonna be an old pro when it comes to handling a circular saw by the time we are finished with this project.  


Here she is, Side No. 2 in all her yellowy glory! (Don't worry, she won't stay this color)  Isn't she just beautiful!  Again, it is quite the transformation!  Can I just for go the other sides and paint Sides 1 and 2 NOW!  Hahaha, patience has never been my strong suit...


Here is the before and after of Side No. 2 of our Shed to Schoolhouse Renovation:


Now I can't wait to build a window box and fill it with flowers and landscape and start on the inside BUT I have to!  Have you ever just wanted to skip ahead on a project just to get to "fun stuff"?  I certainly am having to reign myself in, but just 2 more sides to go then on to the "fluffing"!  In the wise words of Dorey from Disney's "Finding Nemo" "Just keep swimming, just keep swimming..."

Have a blessed day!


Thursday, June 27, 2013

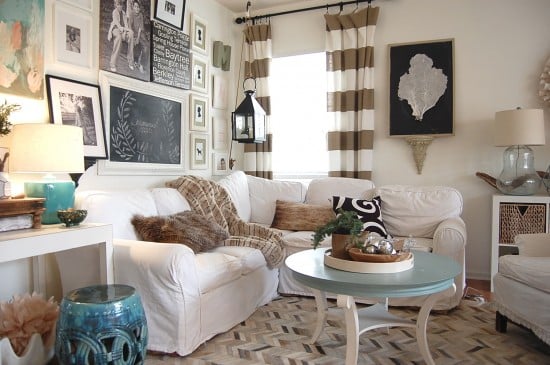
"It's The Nester's coffee table!!!" I exclaimed.

Yep, that's what I giddyly (<--is that a word?) exclaimed when I found this coffee table on craigslist.


I had just shown my husband how a round table looked in her living room and convinced him we needed a round one in our living room too....It would just work better with the layout we have and give our family of four more room to move about than the current Ikea one did.
{via}

I mean look, just LOOK!  It is THE very same table!  I couldn't believe my eyes! Now being a new groupie to the blog world, I was kinda star struck.  I was giddy and shy and just didn't know what to say so I just stared..........at the craigslist post and then The Nester's family room. Should I, Could I?  Twenty dollars, SAY WHAT!?  Why yes I think I will!  Here is my living room with the new addition back in January.


It had a very dark finish on it.  Not quite black, but very dark cherry, almost.  I had planned on painting the piece from the moment I got it.  However, when I got really close in the right light I could see a beautiful wood grain underneath that finish.  The existing finish was doing absolutely nothing for the wood grain.


Since I spied some pretty wood grain, I thought I'd try to do a two-tone finish on it with a wood tone top and a color on the bottom.  The top of the table was clearly a veneer, but I took a chance and stripped it anyway.  If it didn't work, I figured I could always paint it right?  I bought some Citristrip stripping gel to remove the dark stain from the top.  I followed the manufacturer's directions and protected my work area with a tarp, builder paper and a drop cloth.  I used all three, layered, since I was working indoors.  


I applied the gel liberally to the top and let it go to town.


Do you see the grayish/white spots?  At first I thought it was drying.  I tested a spot with my trusty plastic scraper and it wasn't dry at all.  It was just working its magic.  I let the gel sit until I couldn't resist it any longer which was about 15 minutes.  I didn't want the veneer to lift, so I went ahead and scraped away.  This stuff is AMAZING!!!  The old finish slid off like melted butter.  Easy Peasy Lemon Squeezy!

TA-DA!! Pretty wood grain!  Really, isn't it just so pretty!


Yippee, it worked & the veneer was still intact!  Now, this is where I hit a small snag.  There wasn't any veneer on the edges of the top.  (Does that make sense?)  It was only on the top.  So there wasn't anything to strip down to wood grain, just pressed wood.  So I tweaked my plan just a tad.  (You've gotta go with the flow when refinishing furniture!)  I wasn't crazy about the natural wood color against our hardwood floors, so I toned it down with a white wash.  I used Annie Sloan Chalk Paint in Old White, mixed with water, on the top.  The mixture was probably about 3 parts water to one part paint.  I just brushed it on and wiped it off with a soft cloth until I got the effect I was looking for.  After the top was just right, I brushed some more Old White on the edges of the top and went over it with some dark wax so it would sort of blend with the white washed wood tone on the top.  

For the bottom I mixed up some of Miss Mustard Seed's Milk Paint in Lucketts Green with some bonding agent and went to town painting the bottom of the table.   Below is the finished product after some distressing, some clear wax & some dark wax.


I just love the milk paint!  It distressed beautifully and has such a pretty, mottled color to it.  LOVE IT!!  I will certainly be using it again!  (I have some Mustard Seed Yellow just begging to be used for a future project!)   


In the picture below, you can hardly tell that the edge of the top isn't the same as the top itself.  I was so pleased with the final result.  


Now we have our own unique coffee table, in our own unique style!  That is what I love most about painting & refinishing furniture.  You can make it your own.  Even when you have the same coffee table as The Nester, it can still look completely different and work in your home too.  Sa-weet!! 

Here's a final before & after


Tell me, how do you bring a sense of uniqueness to your home??   Last week I shared how I got to help bring a sense of uniqueness to my Sister-in-Laws house.

linking up at:


  Furniture Feature Fridays
Furniture Feature Friday                      
Show Me What Ya Got #125


******************************************
Disclosure:  This post contains affiliate links.